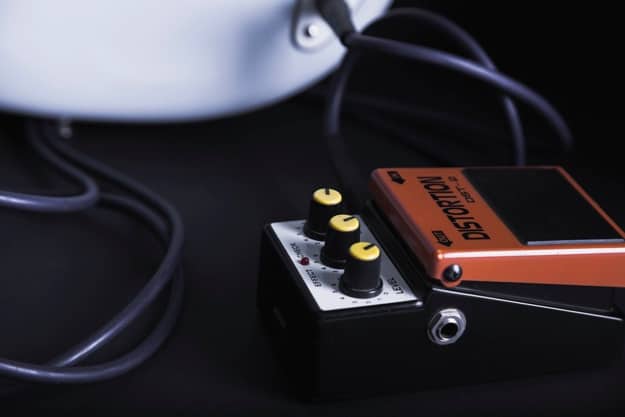
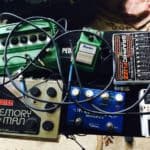
Dialing the perfect tone can be as hard as playing the solo it is intended for.
Many players obsess about their gear, and how it’s set up. From the guitar to the amp, to the pedals, their order, and configuration.
And sometimes, while tweaking some of your pedals, when you least expect it, you find that sweet spot.
Suddenly your sound is just right for what you are playing.
But how can you keep it like that for the next time you pick up your instrument?
The risk of moving the knobs while transporting the pedalboard is always high.
And you don’t want to risk that…
Here are 11 ways to save your settings in a guitar pedal:
- Tape the knobs
- Glue the knobs
- Removing the knobs
- Soldering the knobs
- Taking notes or photos
- Labeling the settings
- Marking with a sharpie or nail polish
- Leaving the pedals in a rack
- Putting a plastic case over the knobs
- Soldering a metal guard over the knobs
- Switching to a digital multi-effects unit
In this article, I will go more in-depth into each of these alternatives to help you decide which one is the best for you.
Are you ready to get started?
Let’s go!
1. Tape
Tape is the all-time lifesaver and in the world of music gear, there is no exception.
Once you found the perfect setting in your pedal, just grab a generous strip of tape and put it over the controls.
This way you will be completely sure that nothing will move when transporting your pedalboard.
This is not the most aesthetic method to do it, but I can assure you it’s quick, simple, and just works.
The main drawback is that the situation could get a bit sticky if you need to make adjustments down the line.
2. Glue
If things get serious glue is always your ally.
Just layout your settings, take the knobs out, and apply generous amounts of glue to both the bottom side of the control knobs and the surface of the pedal.
Make sure to use some kind of glue that works for either metal or plastic surfaces, since those are the most common materials for pedals.
The drawback of this method, as you might imagine is that it is semi-permanent.
Removing the glue might be a messy job, and can ultimately make you damage the finish of the pedal.
3. Remove knobs
Control knobs on pedals are there just for the user experience.
They actually function as a way to offer the player a better grip and some leverage to move the potentiometer heads that input the settings into the circuit.
If you remove the knobs, you will be left with metal headers that are way harder to move involuntarily.
This can be a quick and easy, but fallible, way of preserving your settings.
Although a shift in parameters is harder this way, there’s no guarantee it won’t happen.
4. Solder
If you are someone who likes taking things to the extreme, you might enjoy this one.
However, it will only work if both the pedal case and the knobs are made of metal.
Get your tone and then just solder the knobs in place.
There will be no way of modifying your setup with an accidental bump this way.
However, this is a rather permanent solution, and it will require some extra work reverting it.
5. Take notes / Photos
Do you have a pen and paper at hand?
Just take some notes for your preferred settings and leave them in your guitar case or pedalboard.
The most common way of describing the position of knob parameters is by using clock notation.
For example, if your volume is exactly in the middle, you will say it’s 12 O’clock.
However, if the pedal provides orders of magnitude in its design, that could also work out.
As an alternative, you can just snap a photo with your phone and check it out whenever you need to dial that tone again.
These methods won’t prevent your knobs from moving but will be a great alternative for remembering particular settings, especially if you intend on using various different ones, or you like to leave the ability to tweak your effects open.
6. Label with settings on the pedal
Following the spirit of the last alternative, you could get some sticky labels and put them near or on each knob.
On them, you could write down your preferred settings.
This way you won’t need to carry around a sheet of paper with all of your parameters or scroll through the media gallery on your phone every time you are looking for your tone.
Be careful, however, that these labels can come off rather easily under heavy use.
7. Sharpie / Nail polish
If labels that could come off stress you out, you might want to try a more permanent way of writing down your settings.
A permanent marker as a sharpie, or even a bright color of nail polish, could be a great way of marking your preferred parameters on your effects unit.
Just draw a straight line from the knob that travels directly into the pedal surface.
By doing this, next time, you will just have to make sure both the line in the knob and the one in the pedal are aligned.
If you want to modify your setting in the future, a splash of rubbing alcohol and some friction with a tissue will probably be enough to remove your markings.
8. Leave pedals in a rack
A lot of players that are very picky about their tone, just decide to leave the pedals in a rack to not even have to look at them when they play.
Accidents happen, and messing up dials with your foot when reaching without looking for a switch is common.
The problem here is how you switch them on and off if they are out of reach.
The solution is getting a pedal switcher: A device where all pedals are connected while turned on, and that allows their signal to pass through or be silenced by following presets that the user stored.
In this way, you will have to only deal with a strip of switches in the stage, that will control which pedal (or groups of pedals) turn on or off.
This is a more expensive alternative, but the one many pros choose.
9. Plastic case over knobs
Maybe all your pedals need is a hood to protect their knobs.
This might sound and look a bit wonky, but I can assure you it can work wonders.
It will all depend on how crafty you are, but if I were to do something like this, I will absolutely go for a plastic food tray.
Cut it, shape it, tape it, or glue it, and you are done.
The protection is not fail-proof but will prevent casual bumps and conserve your parameters way better than nothing.
10. Metal bar over knobs
A more metal alternative (pun intended) is to make a guard rail over your knobs.
This will require a lot more skill when working with these materials and soldering, and probably it’s not the best alternative for most players.
However, if you could manage to devise a metal bar that attaches to the pedal firmly and hovers over the knobs, it will not only protect them and make them stay in place, but also it will allow you to still be able to tweak them coming on them from below.
This is likely the most extreme alternative, but not anything unheard of around touring musicians.
11. Use a multi-effects unit
Ok, this can be considered cheating, but if you don’t have a particular love for any of your analog pedals, and if you hate losing your settings constantly, why not consider a multi-effects unit?
With one of these bad boys, whatever parameters you decide on are set in memory forever.
And not only this, you could have hundreds of presets for the same “pedal” in different contexts at your disposal by just pressing a switch.
Again, this is not an alternative for analog lovers, but a very convenient way out for the most pragmatic players.

Hello there, my name is Ramiro and I’ve been playing guitar for almost 20 years. I’m obsessed with everything gear-related and I thought it might be worth sharing it. From guitars, pedals, amps, and synths to studio gear and production tips, I hope you find what I post here useful, and I’ll try my best to keep it entertaining also.

